JupyterLab Tutorial
The Research Computing group provides JupyterLab, a web-based development platform. It allows you to run various applications utilizing the Research Computing group's computing resources.
Accessing JupyterLab
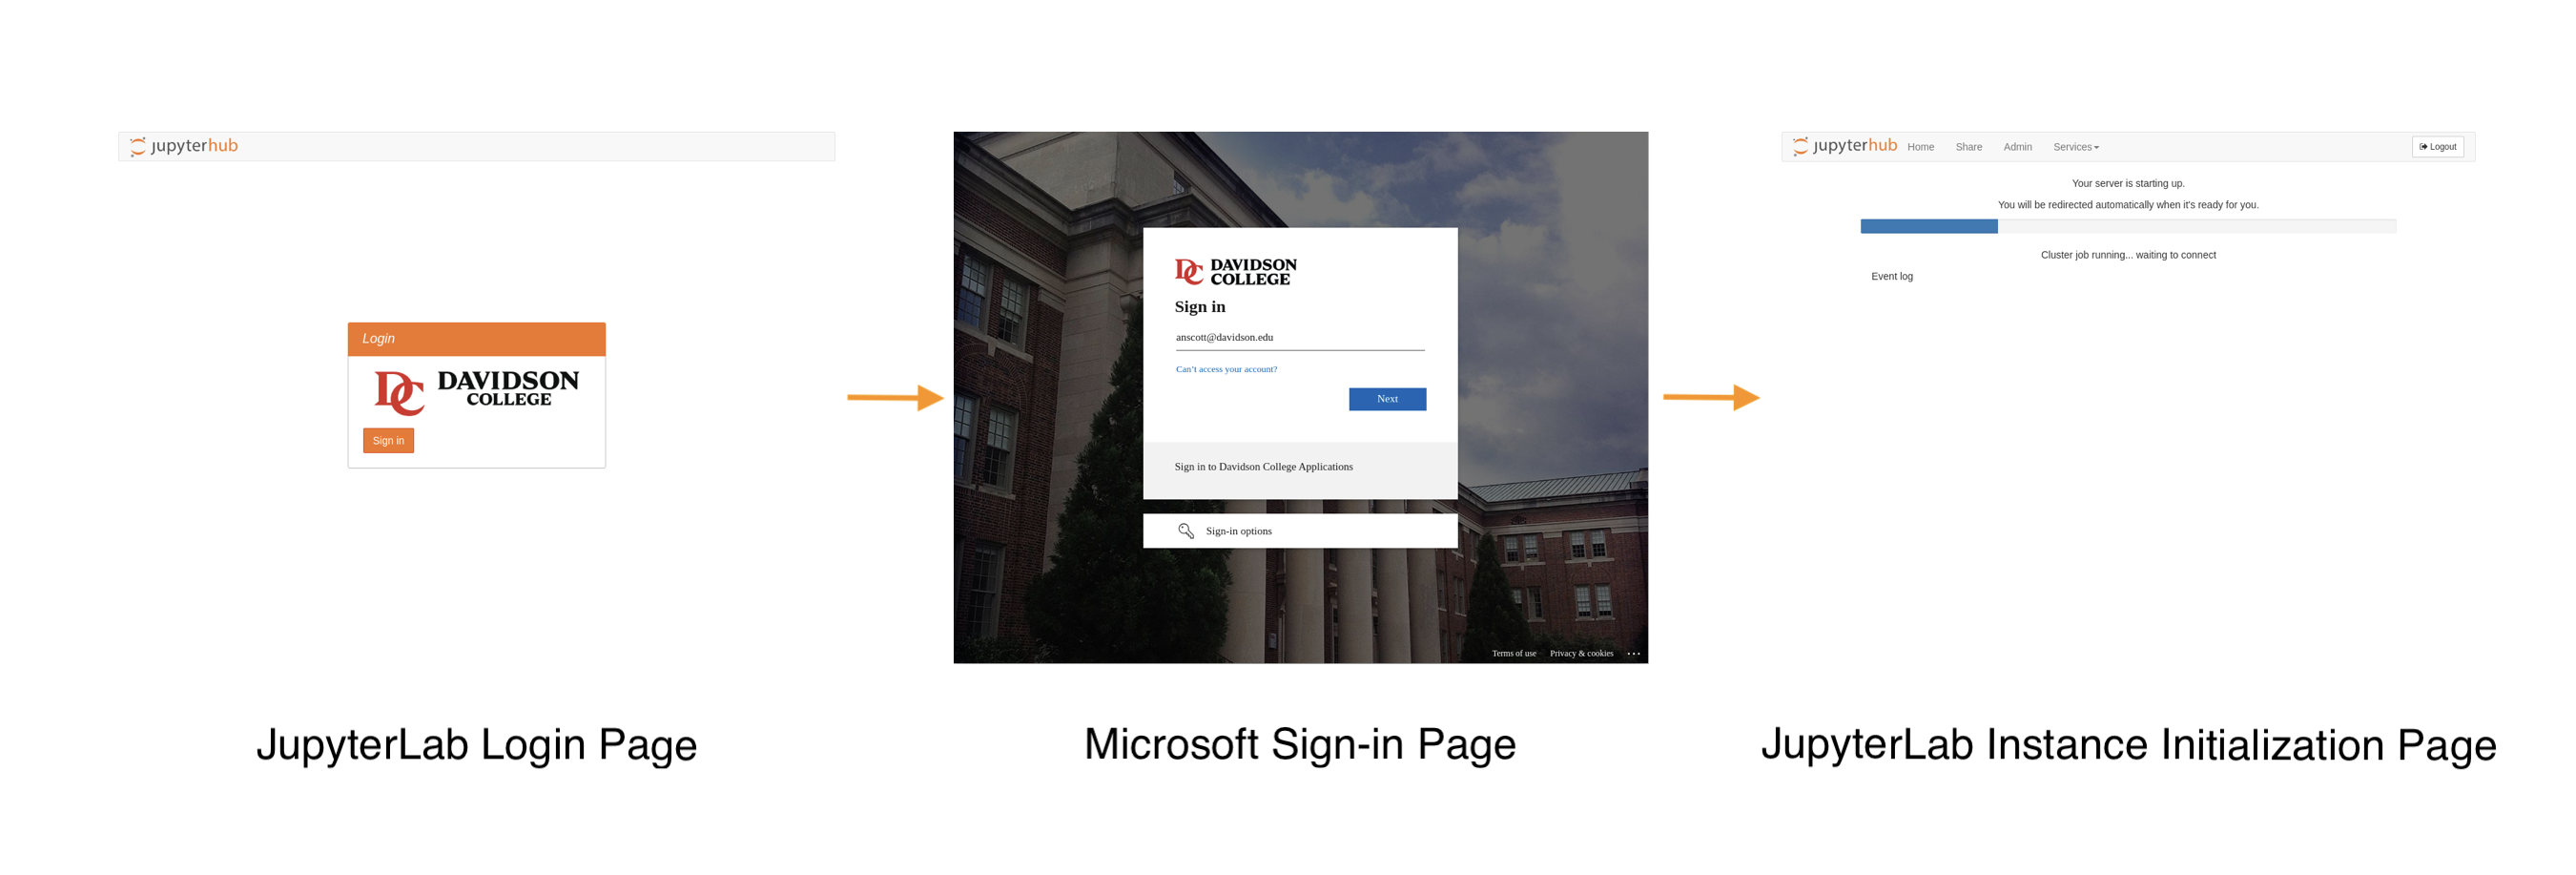
To access a JupyterLab environment, visit the URL provided by your instructor (or jupyter.davidson.edu). Chrome and Firefox are the only supported browsers.
Log in using your full Davidson email credentials (e.g., anscott@davidson.edu) and password. If you can log into a lab computer, you also have access to Jupyter.
After your credentials are verified, an instance will be created, and a blue progress bar will be displayed as your server starts up.
JupyterHub Interface Basics
The Menu Bar
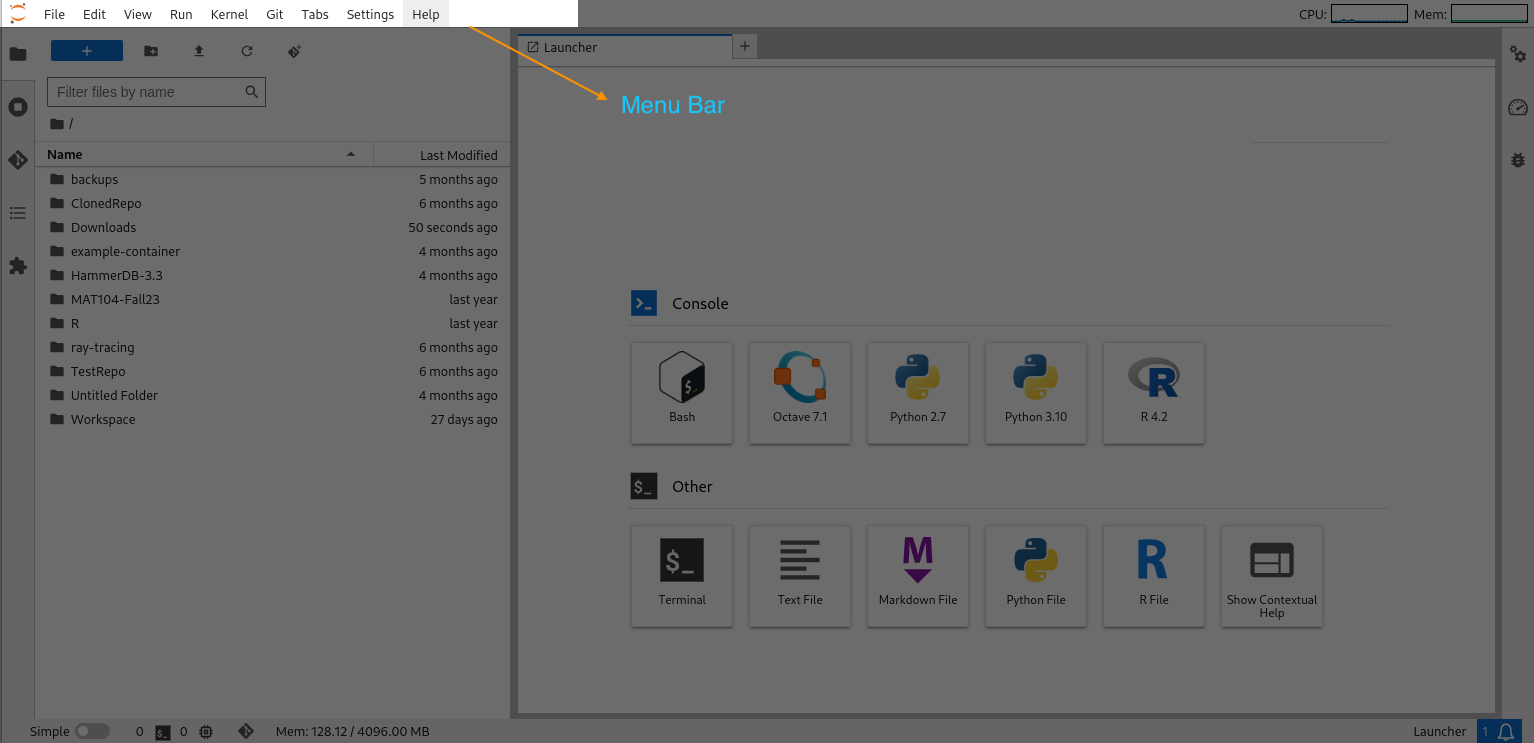
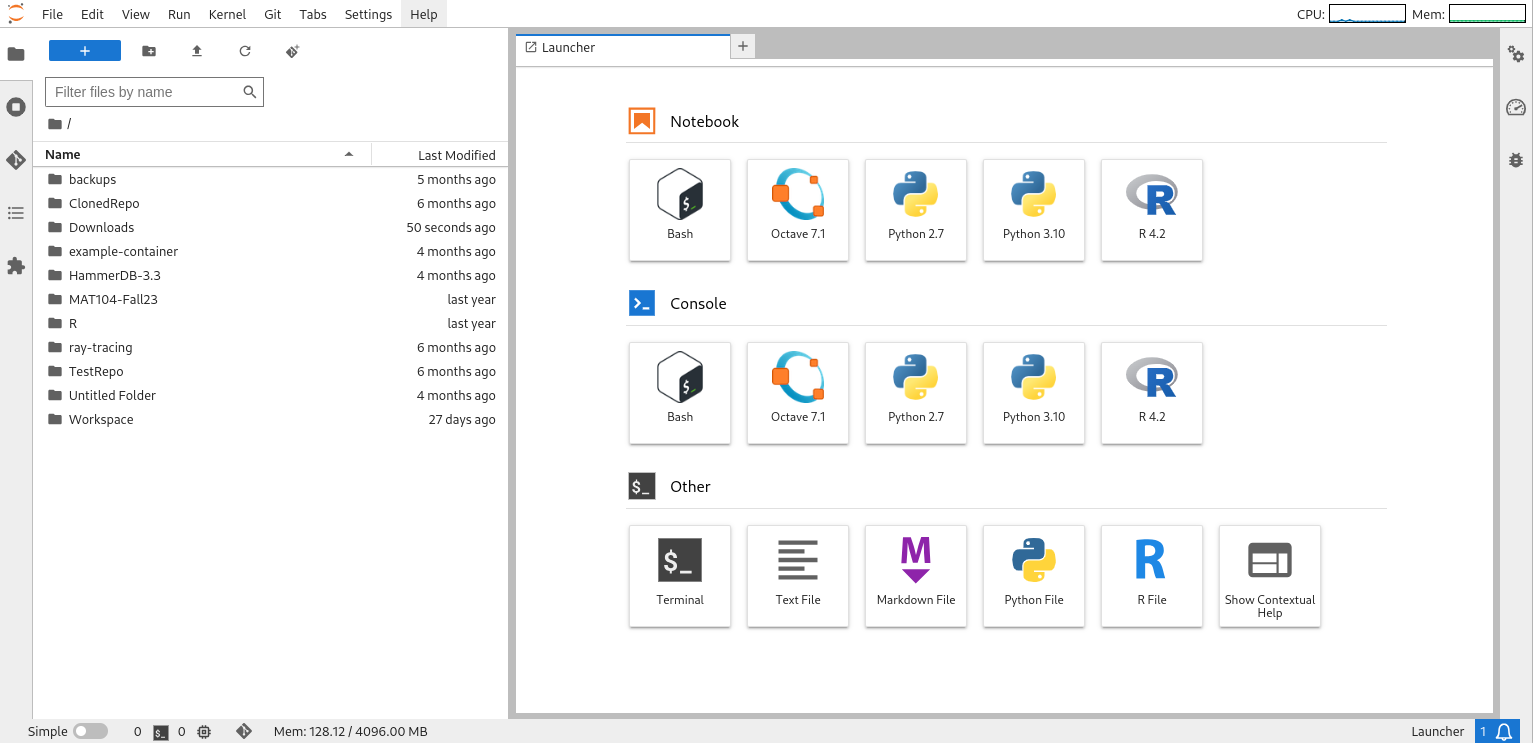
The menu bar at the top of JupyterLab has menus that expose actions available in JupyterLab along with their keyboard shortcuts. The default menus are:
- File: actions related to files and directories
- Edit: actions related to editing documents and other activities
- View: actions that alter the appearance of JupyterLab
- Run: actions for running code in different activities such as notebooks and code consoles
- Git: source code version control related actions
- Tabs: a list of the open documents and activities in the dock panel
- Settings: common settings and an advanced settings editor
- Help: a list of JupyterLab and kernel help links
Resource Monitor
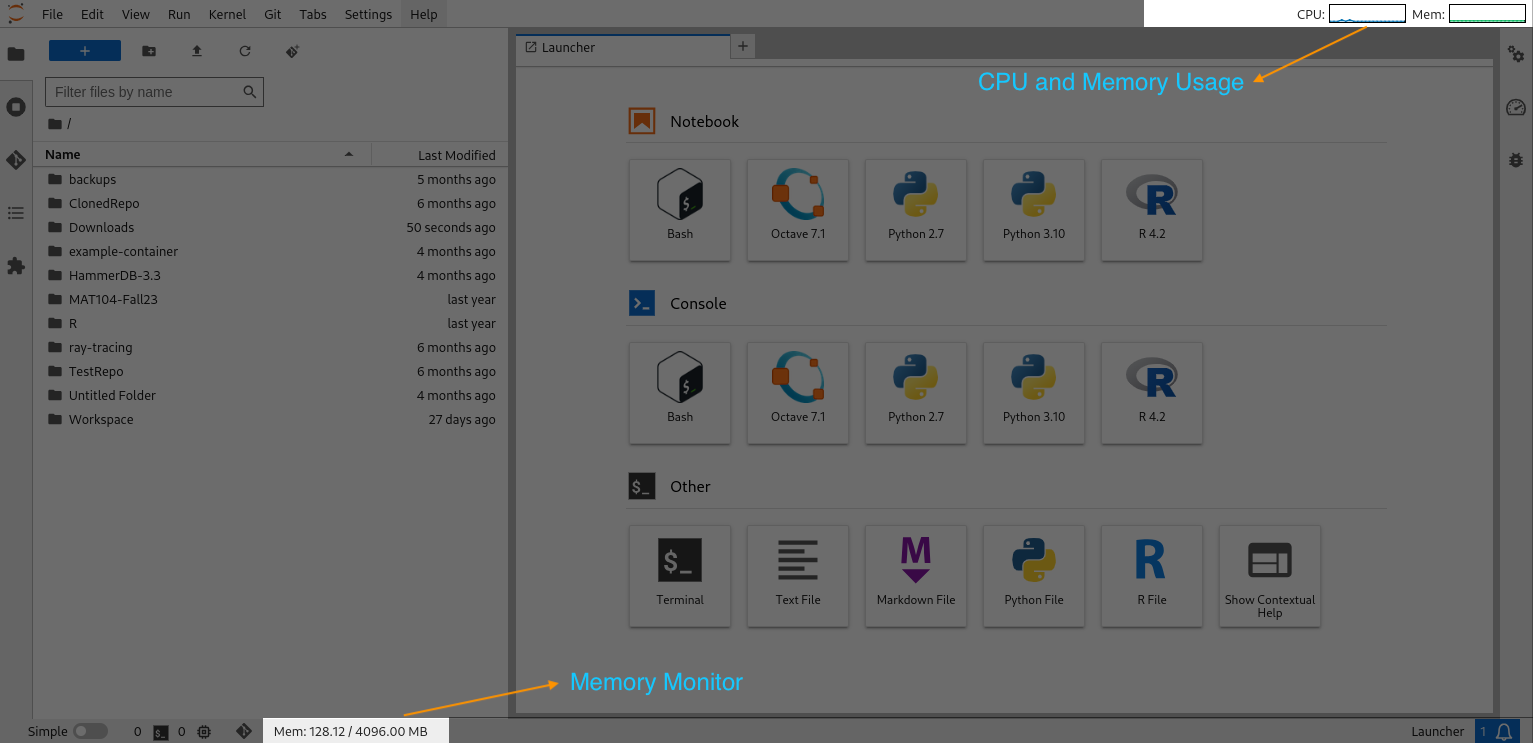 On the top right corner is an indicator of the CPU and the memory usage (in 5-second updates):
The CPU monitor will display usage levels as blue → yellow → red, where red represents approaching the usage threshold. If you exceed the memory threshold, the notebook will shut down.
A numerical memory monitor is also displayed at the bottom of the screen.
Sidebar Panel
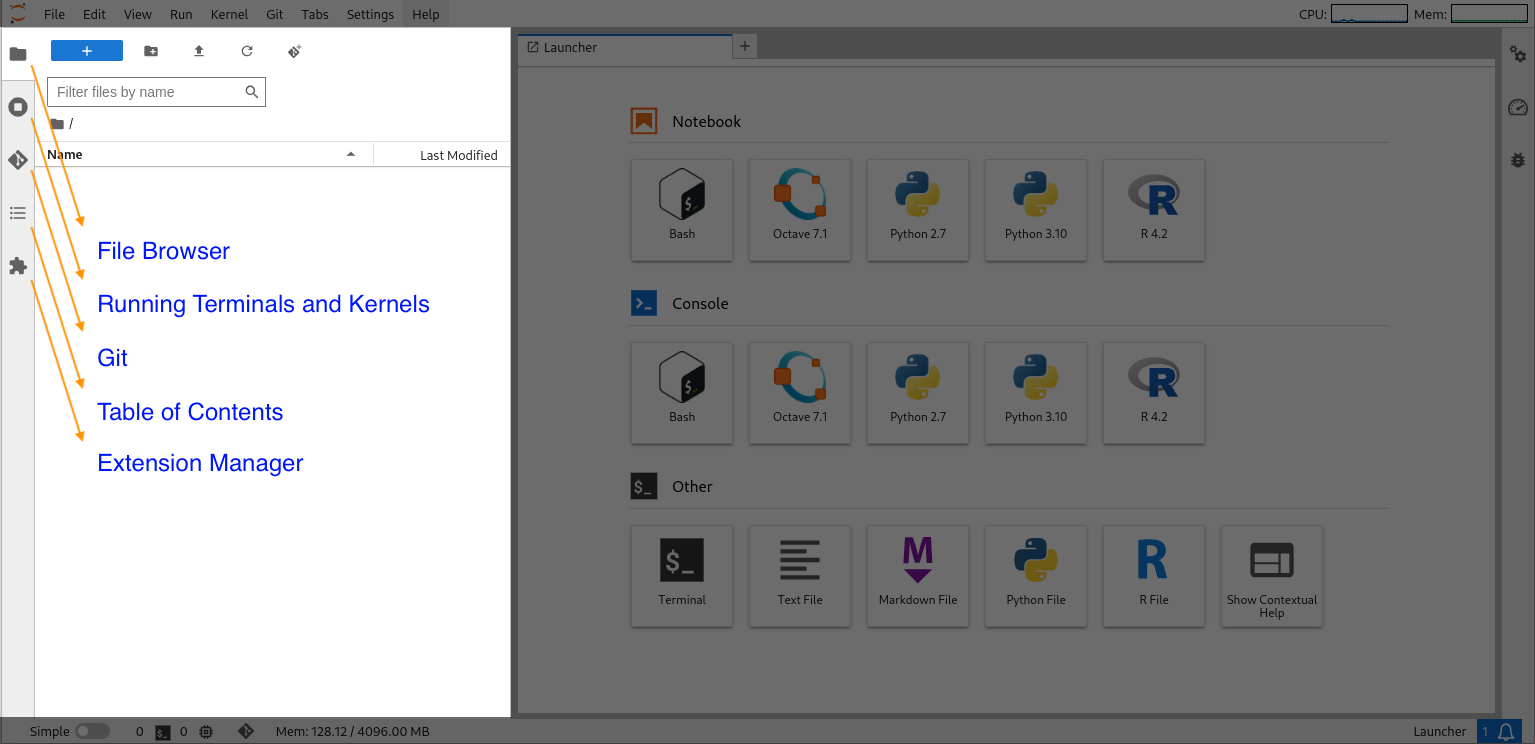
On the left-hand side of the screen is a sidebar that provides more information:
- File Browser: The file browser and File menu enable you to work with files and directories on your system. To download from within the file manager, right-click Download as an Archive (.zip, extraction software default on lab machines).
- Running Terminals and Kernels: A list of tabs in the main work and of running kernels and terminals.
- Git: An interface for making and staging commits while working in a version-controlled directory.
- Table of Contents: An overview (and structure) of the currently active document.
- Extension Manager: Management of third-party extensions.
Installing Extensions
JupyterLab allows users to install extensions to customize the existing functionalities or add new ones. Depending on the extension's installation method, you can either use the Extension Manager or the Terminal to install your own extensions.
Installing Through the Extension Manager Tab
The Extension Manager tab displays two different tabs to the user: Installed and Discover.
The Installed tab lists the extensions that you already have installed on your JupyterLab, and you can delete the extensions if you wish to do so.
The Discover tab lists the extensions you can install on your JupyterLab. You can browse extensions using the search bar provided at the top of the panel. In order to learn more about an extension, you can click on the extension name for further description on what is the extension and how to install it. Once you selected an extension, you can click on the "Install" button to install the extension.
Installing Through the Terminal
From the main menu of JupyterLab, open a new window and start the Terminal application. Before installing extensions on JupyterLab, activate your conda environment by running the conda activate command.
Note
If the conda activate command suggests you to run conda init first, you should do as so and then start a new Terminal application.
Once you have activated your environment, you can install your extensions using conda install command.
Example
You can install the jupyter-resource-usage extension to monitor the CPU usage on your JupyterLab. It can be installed using the following command:
conda install -c conda-forge jupyter-resource-usage
Warning
While installing JupyterLab extensions, ensure they meet the version specifications. For instance, jupyter-resource-usage package requires JupyterLab version 3.x or 4.x, while some of its features only works with ipykernel >= 6.11.0. You can check the versions of these core packages by using the jupyter --version command.
Using Git
You can access Git using the left panel of JupyterLab, and it is installed by default. This panel allows you to use Git with a simplified interface.
Depending on your current directory in the file browser, the Git panel will show different options. If you are in a directory with Git initialized, the panel will have a basic graphical user interface for using Git. If you are not in a directory with Git initialized, then the panel will display the option to you to initialize a repository.
Initializing and Cloning a Repository
The Git panel allows you to initialize a Git repository in your current directory with the Initialize a Repository button if it does not detect one. Before you initialize a Git repository, make sure to be in the correct directory in the File Browser as the Git panel will automatically initialize the repositry in the current directory of the File Browser.
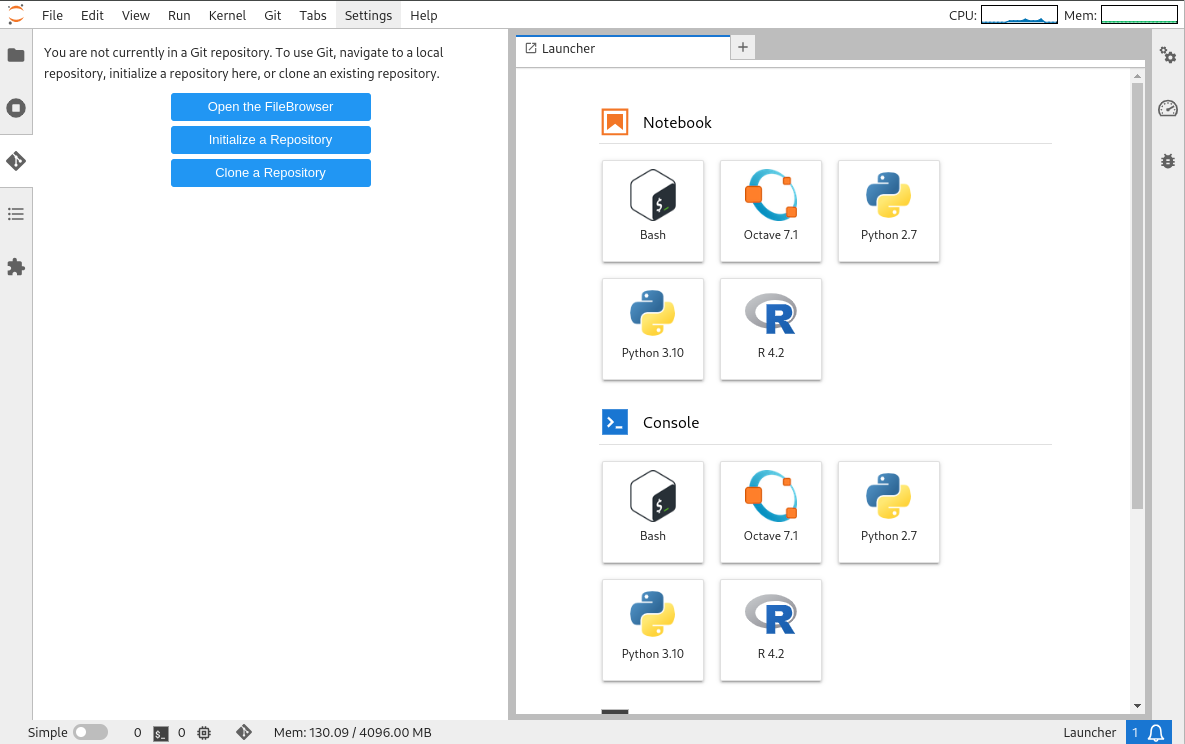
You can also clone a repository by selecting the Clone a Repository option. This will create a copy of the repository using the URL you provided in your current directory.
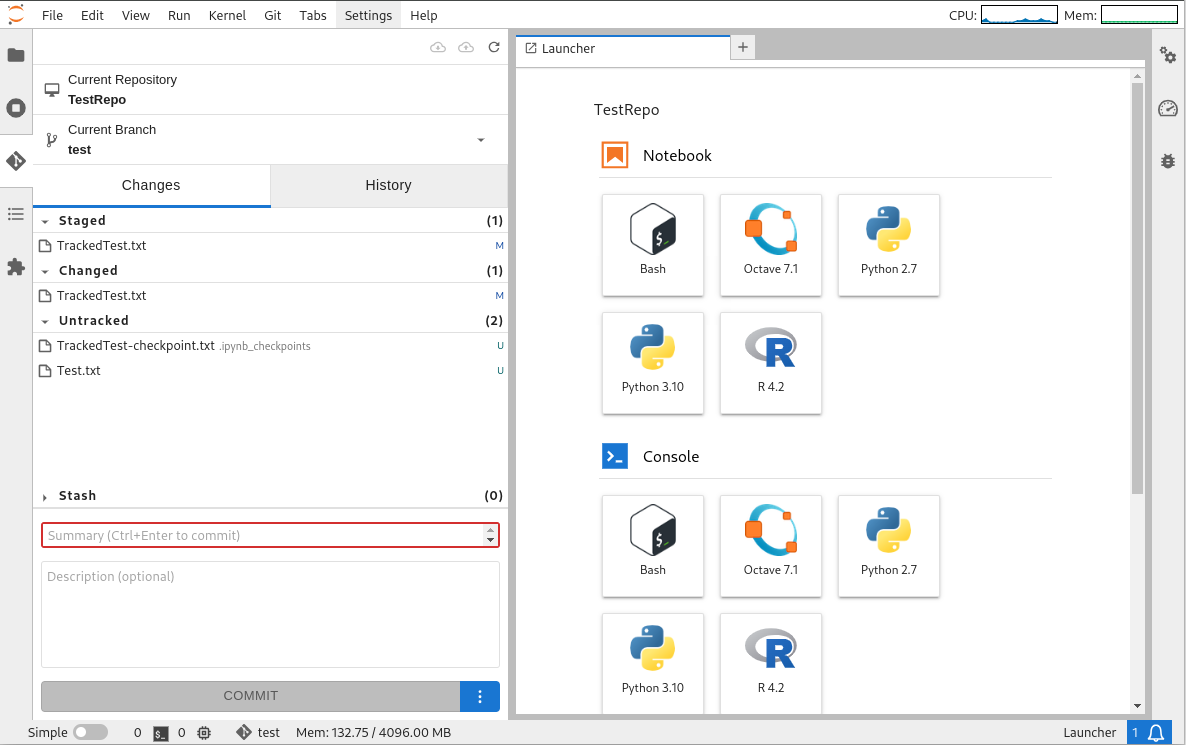
Once you have initialized your repository, the Git panel will provide you some basic functionalities of Git. There are two main tabs to consider on this panel: Changes and History.
Changes Tab
Changes tab includes three sub-tabs named Staged, Changed, and Untracked. Whenever a file in this repository is created/modified/deleted, it will be listed under one of these tabs.
Tracking a File
Once a new file is added to the repository or has never been tracked, it will be listed under the Untracked tab. Git tags every file that needs to be tracked, and if it is not tagged then Git will not watch for changes and get the file uploaded to the repository. If you wish to tag the file, then highlight the file under the Untracked tab and click on the "+" symbol to "track this file".
Example
If you initialize a repository, you can create a test.txt file in your current directory to see it getting listed under "Untracked" tab of the Git panel. Highlight the file and click on the "+" symbol to move the file under the Staged tab.
Commiting a File
Once you have Staged changes (listed under the Staged tab), you can write a Summary Message and a brief description of the changes to save the changes to the repository.
Example
Once test.txt file is staged, then you must write a commit message in the Summary text-box to briefly summarize your changes. Additionally you can also add a description if you need more space for your summary. Then, click on Commit button to save the staged changes.
Warning
Commit button only saves the staged changes (files listed under Staged tab). Files under the Changed and Untracked tabs are not saved.
The first time you commit a file, you will be prompted to enter a name and email address to associate the commit to the repository. Ensure you use the correct email address associated with your repository.
Once changes are commited, you can find the commit details in the History tab which we will discuss later. This tab will allow you to rollback to previous versions of your repository easily.
Modifying a File
Modified files are listed under the Changed tab. When a file is modified, it will automatically be moved to this tab. In order to save the changes, you can click on the "+" symbol to "stage the changes".
Example
Select your test.txt file in your repository from the File Browser and then type a random text in it. Then, save the file using the upper menu: "File->Save Text". From the Git panel, you can see this file now listed under the Changed tab. You can stage the changes and commit to save the changes to the repository.
Warning
If you modify a staged file, it will move back to the Changed tab because its contents have changed. In order to save the latest state of the file, you have to stage the file again.
If you want to revert a file back to the previous staged version, you can highlight the file and click on the "↺" symbol to revert changes. This will immediately revert the changes and you may no longer have access to your edits.
History Tab
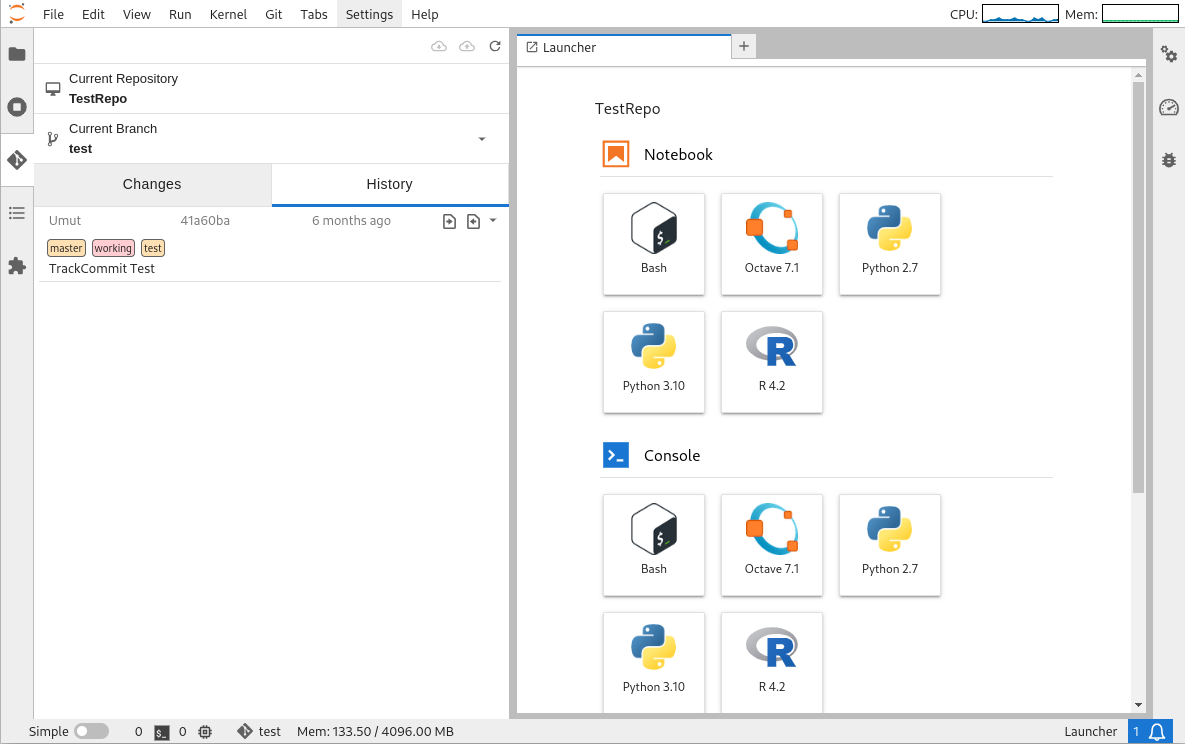
Whenever you commit to the repository, each of the commits are listed under this tab. It will display various tags depending on which branch this commit belongs to, but also the name of the commit. You can uncollapse the commit to list the changes that were made in that commit, and revert back to those changes.
Configuration Files
When you are running your own JupyterLab, there may be some settings you wish to configure. These can be changing default new file name, the day format, or the file content hashing algorithm. All of these and more can be changed through the Jupyter configuration file.
You can create your own configuration file by first changing your current directory into the ~/.jupyter folder in your home directory using the cd ~/.jupyter command/ Then, you can use the jupyter server --generate-config command to create the default configuration file. It will create a file named "jupyter_server_config.py" in "~/.jupyter" folder. This file consists of a long list of options you can change. Refer to the official configuration documentation for details.
Warning
If you create multiple configuration files, keep in mind that JupyterLab checks configuration files in a hierarchy that can be found by using the jupyter --paths command. If you have multiple configuration files, you should check for possible conflicts.
Alongside the configuration file, you can also use the "Settings Editor" that can be found under the Help tab of the top menu bar.
Installing and Managing Kernels
Kernels in JupyterLab are programing language specific programs. Default JupyterLab configurations of the Research Computing group provides kernels such as R, Octave, and Python. Alonside these, you can install additional kernels.
Each kernel requires its own way of installation, so refer to the list of JupyterLab kernels and their corresponding installation pages for further instructions.
You can list the kernels installed in your JupyterLab by using the jupyter kernelspec list command.
Example
You can install the Rust kernel by running the following commands:
curl --proto '=https' --tlsv1.2 -sSf https://sh.rustup.rs | sh
rustup update
cargo install --locked evcxr_jupyter
evcxr_jupyter --install
rustup component add rust-src
Once installed, Rust will be an option under the notebooks.
Further Reading
- For troubleshooting installing extensions refer to JupyterLab Extension Documentation.
- An unofficial list of JupyterLab extensions